Set up CI/CD for Rails app using GitHub actions <> AWS Beanstalk ☁️

Sandesh Bodake

What is CI/CD?

In software engineering, CI/CD or CICD generally refers to the combined practices of continuous integration and either continuous delivery or continuous deployment. CI/CD bridges the gaps between development and operation activities and teams by enforcing automation in building, testing and deployment of applications.

Let’s start the execution step by step.

CI (Continues Integration)

Step 1

Let’s start creating a new workflow in GitHub actions that will perform those tasks. in your root rails project.

mkdir -p .github/workflows
touch .github/workflows/main.yml

Step 2

The mail.yml where we defined our workflow CI and CD. We name our workflow CI/CD, Then list the name of our events which will trigger our workflow.

# main.yml

name: CI/CD
on: [push, pull_request]

Step 3

Use the ubuntu latest image to install all necessary libraries and PostgreSQL as database

name: CI/CD
on: [push, pull_request]
jobs:
build:
runs-on: ubuntu-latest
services:
db:
image: postgres:11
ports: ["5432:5432"]
env:
POSTGRES_USER: postgres
POSTGRES_PASSWORD: postgres
options: >-
--health-cmd pg_isready
--health-interval 10s
--health-timeout 5s
--health-retries 5
redis:
image: redis
ports: ["6379:6379"]
options: --entrypoint redis-server
view raw main2.yml hosted with ❤ by GitHub

services can be used to create additional containers for a job or steps. In our case, we are using it to spin-off postgres and redis service.


Step 4

We can define a sequential task that we want to perform in the machine with steps statement.

Next thing we will do is check out our rails app. Github provides official, ready to use actions an one of those is action/checkout we can directly use this action directly using statement use.

Similarly other actions actions/setup-ruby and bolares/actions-yarn is used to check out the ruby version and yarn package manager that we want to use for our rails app.

name: CI/CD
on: [push, pull_request]
jobs:
build:
runs-on: ubuntu-latest
services:
db:
image: postgres:11
ports: ["5432:5432"]
env:
POSTGRES_USER: postgres
POSTGRES_PASSWORD: postgres
options: >-
--health-cmd pg_isready
--health-interval 10s
--health-timeout 5s
--health-retries 5
redis:
image: redis
ports: ["6379:6379"]
options: --entrypoint redis-server
view raw main2.yml hosted with ❤ by GitHub

In the above snippet 👆, we just added steps for setting up ruby environment and yarn.

More about bolares/actions-yarn is here

Step5

Once the code has been checked out and correct ruby version is set up, we install the gems using bundler and then run the specs

Let’s add one more step for setting up our rails application.

steps:
- uses: actions/checkout@v1
- name: Setup Ruby
uses: actions/setup-ruby@v1
with:
ruby-version: 2.6.x
- uses: borales/actions-yarn@v2.0.0
with:
cmd: install
- name: Build and run test
env:
DATABASE_URL: postgres://postgres:@localhost:5432/test
REDIS_URL: redis://localhost:6379/0
RAILS_ENV: test
POSTGRES_USER: postgres
POSTGRES_PASSWORD: postgres
run: |
sudo apt-get -yqq install libpq-dev
gem install bundler
bundle install --jobs 4 --retry 3
bundle exec rake db:create
bundle exec rake db:migrate
bundle exec rspec .
view raw main4.yml hosted with ❤ by GitHub

In the above 👆 snippet, we are adding some necessary environment variables and executing the necessary commands.

First, we installed bundlergem, then create and migrate the database and finally running Rspec test cases.

Note: I’m using Rspec testing library you can put other as well

That’s it, we successfully integrate CI workflow for our Rails app successfully, now if push the changes you can see GitHub actions start executing.
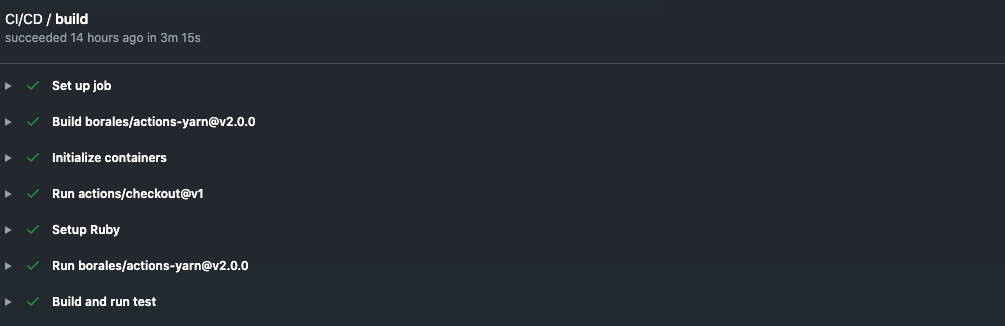
CI WorkflowCI Workflow

You can see your actions are executing successfully 🙂.

If you missed something below 👇 is the full snippet for CI workflow.

name: CI/CD
on: [push, pull_request]
jobs:
build:
runs-on: ubuntu-latest
services:
db:
image: postgres:11
ports: ["5432:5432"]
env:
POSTGRES_USER: postgres
POSTGRES_PASSWORD: postgres
options: >-
--health-cmd pg_isready
--health-interval 10s
--health-timeout 5s
--health-retries 5
redis:
image: redis
ports: ["6379:6379"]
options: --entrypoint redis-server
steps:
- uses: actions/checkout@v1
- name: Setup Ruby
uses: actions/setup-ruby@v1
with:
ruby-version: 2.6.x
- uses: borales/actions-yarn@v2.0.0
with:
cmd: install
- name: Build and run test
env:
DATABASE_URL: postgres://postgres:@localhost:5432/test
REDIS_URL: redis://localhost:6379/0
RAILS_ENV: test
POSTGRES_USER: postgres
POSTGRES_PASSWORD: postgres
run: |
sudo apt-get -yqq install libpq-dev
gem install bundler
bundle install --jobs 4 --retry 3
bundle exec rake db:create
bundle exec rake db:migrate
bundle exec rspec .
view raw main.yml hosted with ❤ by GitHub


CD(Continuous delivery)

Now Let’s move to the CD(continues delivery) part, before moving further you must have an account on AWS

Step1

Install CLI elastic beanstalk on your local machine.

brew install aws-elasticbeanstalk

Go to your project directory and initialize elastic beanstalk using the command

eb init

During init, elastic beanstalk shows some CLI questions & it will create config.yml like below 👇

branch-defaults:
master:
environment: staging
group_suffix: null
global:
application_name: testing-rails
branch: null
default_ec2_keyname: xxxx
default_platform: Puma with Ruby 2.6 running on 64bit Amazon Linux
default_region: ap-south-1
include_git_submodules: true
instance_profile: null
platform_name: null
platform_version: null
profile: eb-cli
repository: null
sc: git
workspace_type: Application
view raw eb_config.yml hosted with ❤ by GitHub

Step2

Create a project with Postgres.

eb create staging -db.engine postgres

Above 👆command will start creating our project ready for deployment.

2020-09-12 14:59:43 INFO createEnvironment is starting.
2020-09-12 14:59:44 INFO Using elasticbeanstalk-ap-south-1-575689566956 as Amazon S3 storage bucket for environment data.
2020-09-12 15:00:10 INFO Created target group named: arn:aws:elasticloadbalancing:ap-south-1:575689566956:targetgroup/awseb-AWSEB-18R2XQ1R8YMFV/e7c91bd35ed8fb5a
2020-09-12 15:00:10 INFO Created security group named: sg-0e97209914d26387b
2020-09-12 15:00:26 INFO Created security group named: awseb-e-urp3iwwxh3-stack-AWSEBSecurityGroup-1AO6G8UOUXC80
2020-09-12 15:00:26 INFO Created Auto Scaling launch configuration named: awseb-e-urp3iwwxh3-stack-AWSEBAutoScalingLaunchConfiguration-509D9VK4UOUY
2020-09-12 15:00:26 INFO Created security group named: awseb-e-urp3iwwxh3-stack-AWSEBRDSDBSecurityGroup-16MS5ESZRS3EO
2020-09-12 15:00:41 INFO Creating RDS database named: aa19ydkibpws6jb. This may take a few minutes.
2020-09-12 15:02:15 INFO Created load balancer named: arn:aws:elasticloadbalancing:ap-south-1:575689566956:loadbalancer/app/awseb-AWSEB-2KHZYMLZHUJA/47bcde8d23c308c5
2020-09-12 15:02:15 INFO Created Load Balancer listener named: arn:aws:elasticloadbalancing:ap-south-1:575689566956:listener/app/awseb-AWSEB-2KHZYMLZHUJA/47bcde8d23c308c5/c6766141be366dbc
.....
view raw eb.log hosted with ❤ by GitHub

Here is the sample log once we start creating it.

You might get an error here because we haven’t set up database.yml correctly.

Step3

Add production configure like below 👇 in your database.yml file

production:
adapter: postgresql
encoding: unicode
database: <%= ENV['RDS_DB_NAME'] %>
username: <%= ENV['RDS_USERNAME'] %>
password: <%= ENV['RDS_PASSWORD'] %>
host: <%= ENV['RDS_HOSTNAME'] %>
port: <%= ENV['RDS_PORT'] %>
password: postgres

Now, the setup environment variable

eb setenv SECRET_KEY_BASE= xxxxxx

For SECRET_KEY_BASE just fire on terminal

RAILS_ENV=production bundle exec rake secret

That’s it we are done with all configuration lets deploy our application.

eb deploy staging

If you check on AWS Elastic Beanstalk dashboard you can see our application created successfully.

Step4

Beanstalk Deploy is a GitHub action (and command-line script) to deploy apps to AWS Elastic Beanstalk. It takes the application name, environment name, version name, region and filename as parameters, uploads the file to S3, creates a new version in Elastic Beanstalk, and then deploys that version to the environment. It will wait until the deployment is finished, logging any messages from the environment during the update and exiting with a non-zero exit code if the deployment fails. It does not handle rolling back the environment.

Now let’s add this to our Github Action workflow

- name: Generate deployment package
run: |
zip -r deploy.zip . -x '*.git*'
- name: Deploy to EB
uses: einaregilsson/beanstalk-deploy@v11
with:
aws_access_key: ${{ secrets.AWS_ACCESS_KEY_ID }}
aws_secret_key: ${{ secrets.AWS_SECRET_ACCESS_KEY }}
application_name: testing-rails
environment_name: staging
version_label: 2
region: ap-south-1
deployment_package: deploy.zip
view raw cd.yml hosted with ❤ by GitHub

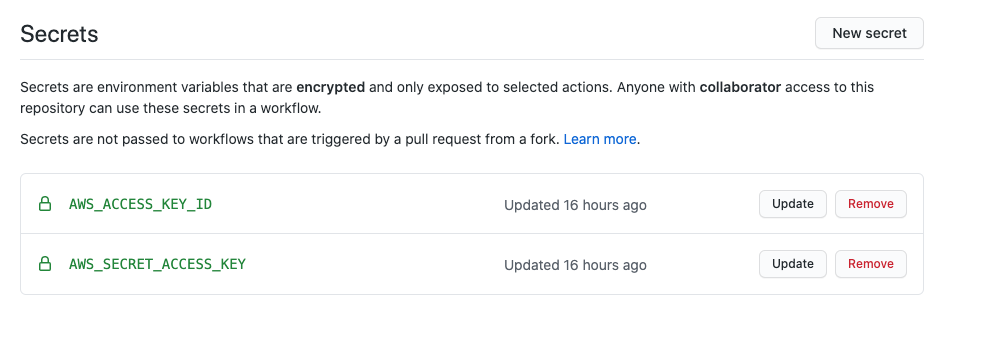
Here you can see we need AWS_ACCESS_KEY and AWS_SECRET_ACCESS_KEY using GitHub secrets you can add your credentials and those environmental variables accessible in your GitHub workflow.

Now let’s push our workflow changes & let’s see the result…

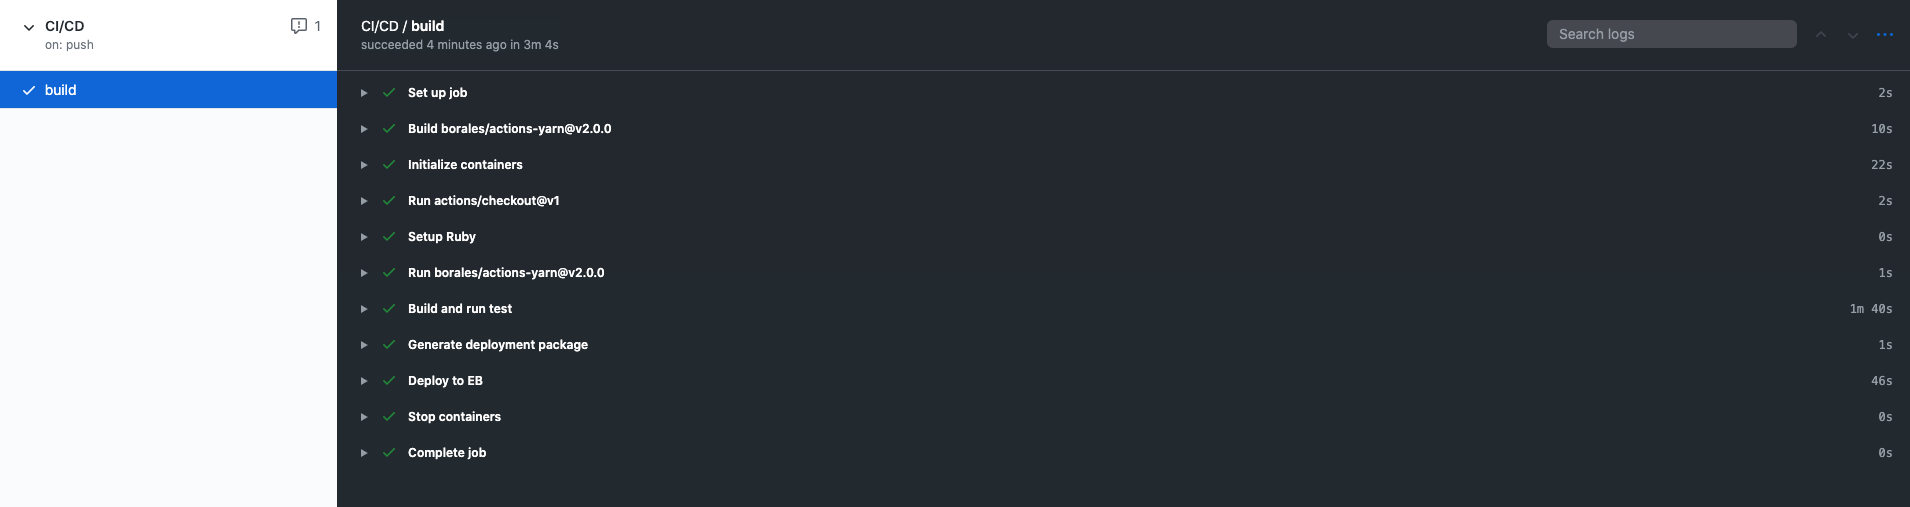
Hureeeee 🎉, our code builds successfully and deployed to AWS Beanstalk.

Here is a full code snippet 👇

name: CI/CD
on: [push, pull_request]
jobs:
build:
runs-on: ubuntu-latest
services:
db:
image: postgres:11
ports: ["5432:5432"]
env:
POSTGRES_USER: postgres
POSTGRES_PASSWORD: postgres
options: >-
--health-cmd pg_isready
--health-interval 10s
--health-timeout 5s
--health-retries 5
redis:
image: redis
ports: ["6379:6379"]
options: --entrypoint redis-server
steps:
- uses: actions/checkout@v1
- name: Setup Ruby
uses: actions/setup-ruby@v1
with:
ruby-version: 2.6.x
- uses: borales/actions-yarn@v2.0.0
with:
cmd: install
- name: Build and run test
env:
DATABASE_URL: postgres://postgres:@localhost:5432/test
REDIS_URL: redis://localhost:6379/0
RAILS_ENV: test
POSTGRES_USER: postgres
POSTGRES_PASSWORD: postgres
run: |
sudo apt-get -yqq install libpq-dev
gem install bundler
bundle install --jobs 4 --retry 3
bundle exec rake db:create
bundle exec rake db:migrate
bundle exec rspec .
- name: Generate deployment package
run: |
zip -r deploy.zip . -x '*.git*'
- name: Deploy to EB
uses: einaregilsson/beanstalk-deploy@v11
with:
aws_access_key: ${{ secrets.AWS_ACCESS_KEY_ID }}
aws_secret_key: ${{ secrets.AWS_SECRET_ACCESS_KEY }}
application_name: testing-rails
environment_name: staging
version_label: 3
region: ap-south-1
deployment_package: deploy.zip
view raw main_c.yml hosted with ❤ by GitHub

Conclusion

There are many tools that can help enable a smoother transition to a CI/CD process. Testing is a large part of that process because even if you are able to make your integrations and delivery faster, it would mean nothing if was done so without quality in mind. Also, the more steps of the CI/CD pipeline that can be automated, the faster quality releases can be accomplished.


At Scalereal We believe in Sharing and Open Source.

So, If you found this helpful please give some claps 👏 and share it with everyone.

Sharing is Caring!

Thank you ;)