
Have you ever wondered “how do I receive online payments on a new cool app that I have built using my favorite framework, Django”? ⚡
I did too and after a bit of digging about what are the available payment gateways that work in India I came up with the list of 5–6 payment gateways.
Out of those, Razorpay stood out to me with the range of financial products and solutions it provides. Also, their APIs are really well built. So, I chose to use Razorpay as my payment gateway.
So fellow Pythonistas, in this article I will give the basic outline of how to integrate a Razorpay payment gateway into your website.
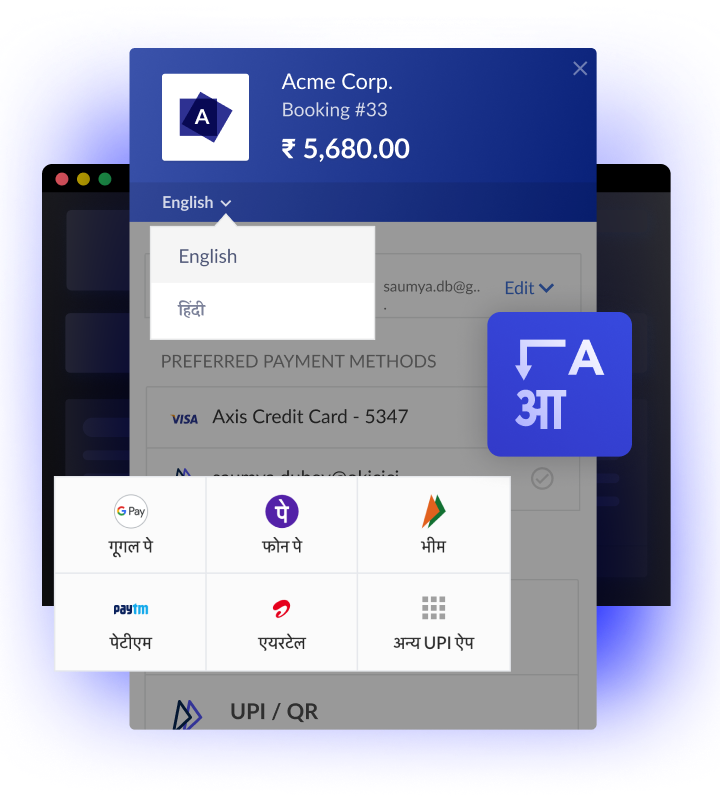
Thinking about how the Razorpay payment gateway works🤔 Let’s see
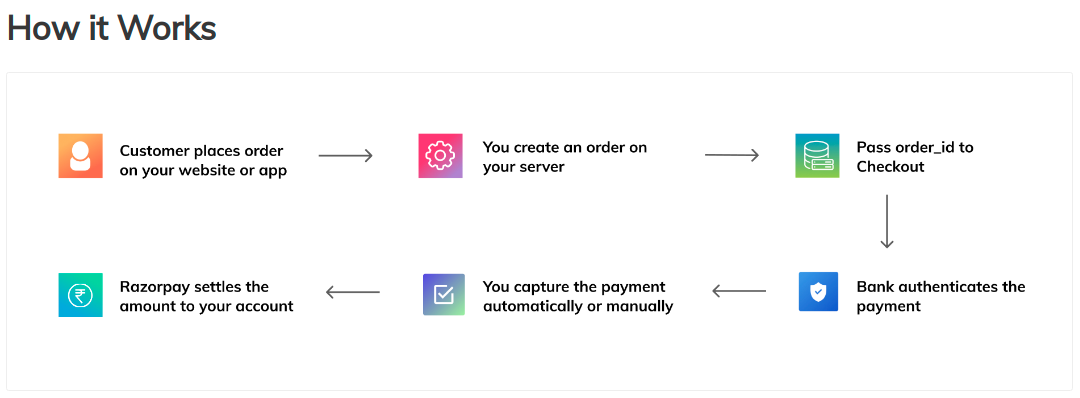 source: razorpay.com
Steps to integrate Razorpay payment gateway 🚀
STEP 1 - Setting up Razorpay account
To use Razorpay you will have to first configure it. Following are the steps:
- Go to razorpay.com → Sign up → Go to the settings.
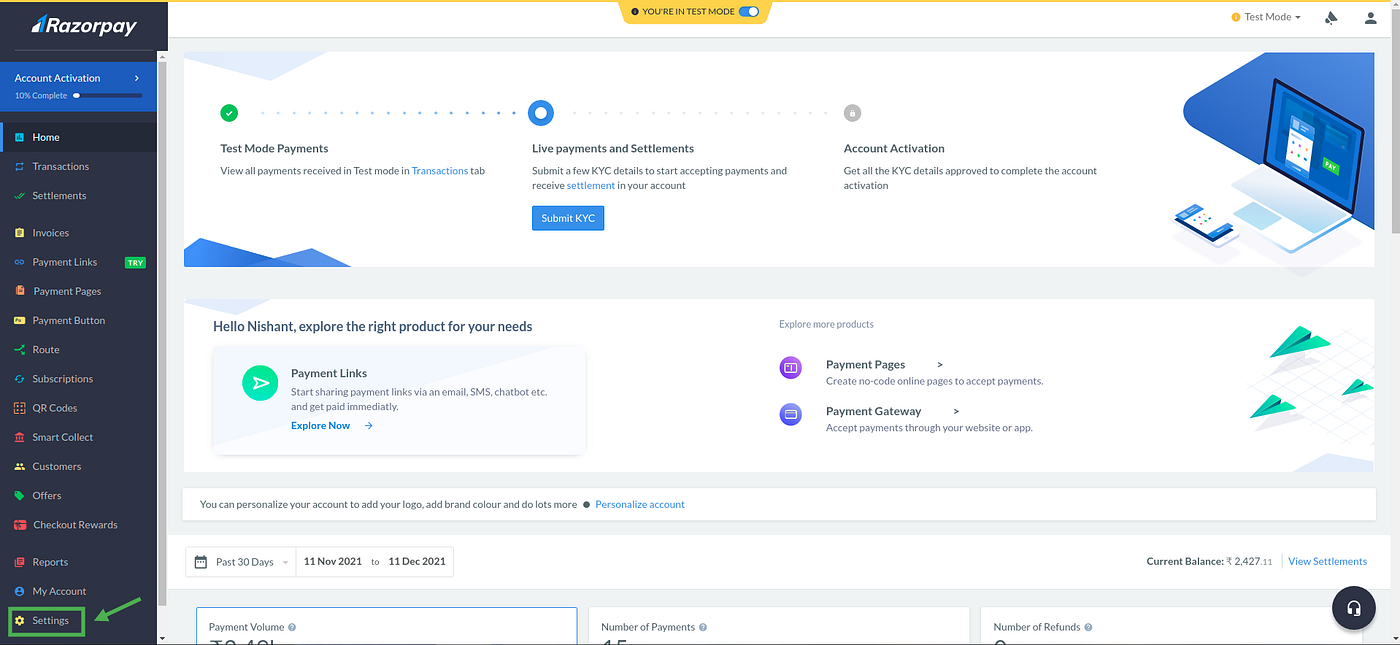 source: razorpay.com
- Now click on the API Keys tab.
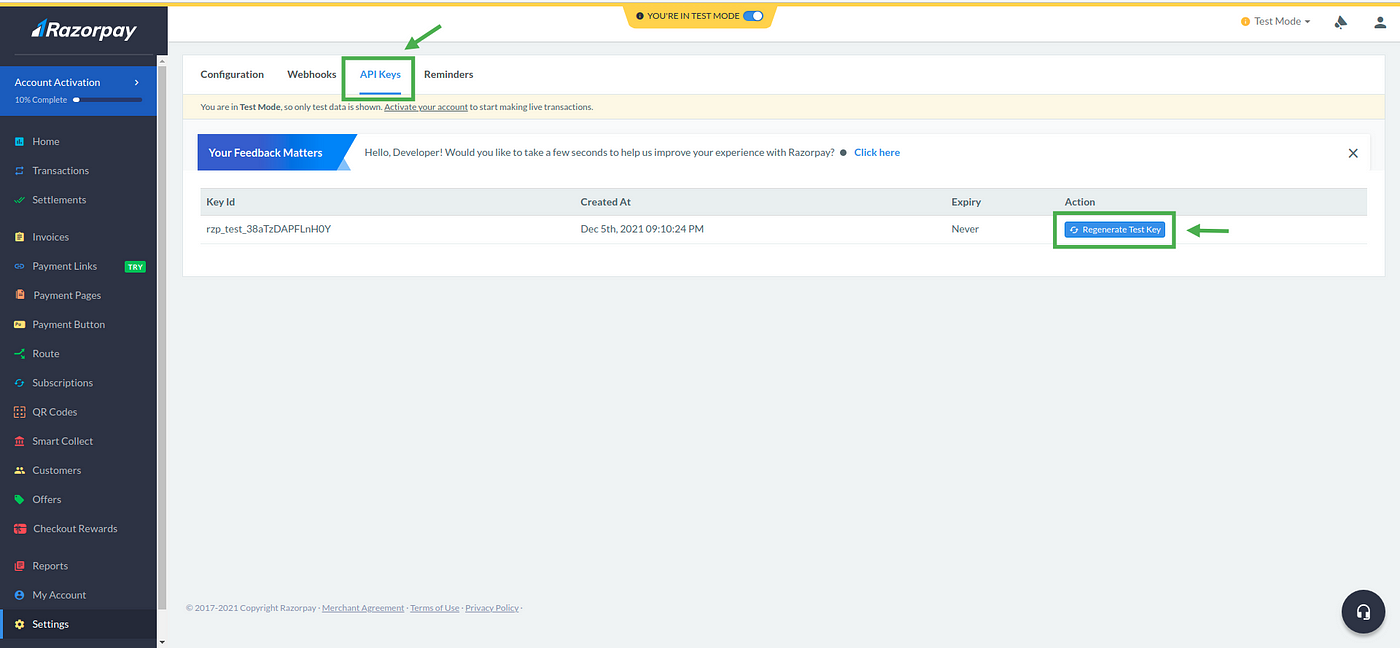 source: razorpay.com
- Now, Click on Generate API keys button.
source: razorpay.com
- This will generate a new key and show you the
Key IdandKey Secretin a popup. Below these fields, you will see a link to Download Key Detail, click on that and let the download complete.
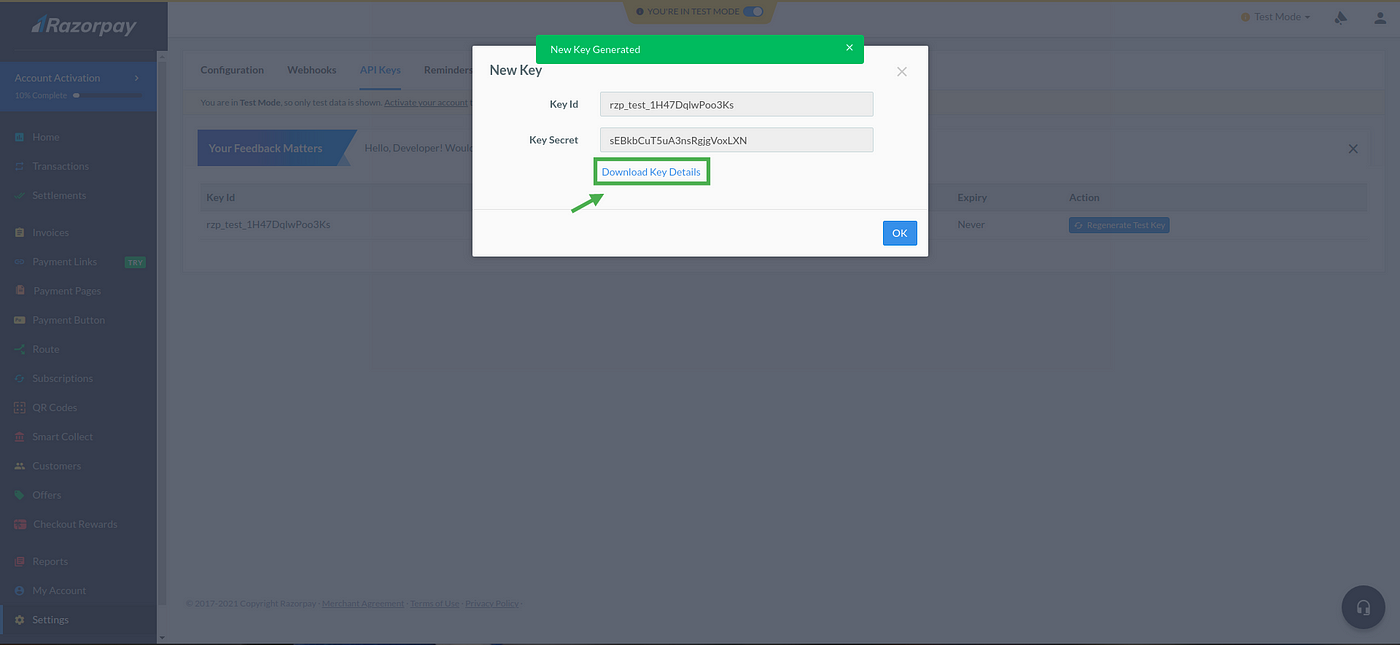 source: razorpay.com
STEP 2 - Store the downloaded API keys in your settings.py file
Note: Do not store these secrets in the setting file of your production projects rather read it through Env variables or some secret-vault like AWS Secret Manager or Hashicorp Vault.
STEP 3 - Install Razorpay library
pip install razorpay
STEP 4 - Create the Order Schema
- We are importing
PaymentStatusfrom constants.py file.
STEP 5 - Creating Razorpay order
- First, let’s create the template to take input from the user.
- Now we will create an order_payment view to create order at the backend.
- And after that will create a Razorpay order using the API keys.
💡 For every payment, a Razorpay order needs to be created. It is compulsory to create orders to capture payments automatically.
- We are creating Razorpay order using the Orders API. It is a server-to-server call that is secured by basic auth using your API keys.
💡 Amount in Razorpay works in subunits of currency i.e Rs 700 would become 70000 paise. That’s why we multiplied the amount by 100.
- 🧐Let’s see the response object of Orders API that we are storing in razorpay_order
{
  "id": "order_IX37nLMvHfLsSO",
  "entity": "order",
  "amount": 789600,
  "amount_paid": 0,
  "amount_due": 789600,
  "currency": "INR",
  "receipt": null,
  "offer_id": null,
  "status": "created",
  "attempts": 0,
  "notes": [],
  "created_at": 1639418188
}
Wondering why we passed callback_url🤔
After payment, users will be redirected to this URL on successful payment and failed payment.
- Let’s create a template to load Razorpay’s javascript code that will render the payment window.
💡 Significance of redirect parameter
- The redirect parameter will determine whether to POST response to the event handler post-payment completion or redirect to the callback URL.
a. When a redirect is true user is redirected to the specified callback URL in case of payment failure.
b. When a redirect is false user is shown the Checkout popup to retry the payment. - Setup urls.py file
STEP 6 - Making Payment
- As the Razorpay javascript loads, the user can make payments with test credentials.
- Handling the successful and failed payment is done with the help of the callback URL.
STEP 7 - Handling Successful and Failed payment.
- Let’s create a callback view to handle successful and failed payments.
💡 As POST request will be made by Razorpay and it won’t have the csrf token, so we need to
csrf_exemptthis url.
- Successful Payment 😁
1] In the case of successful payment, Razorpay will make a POST call to the callback URL that we have provided, with therazorpay_payment_id,razorpay_order_id, andrazorpay_signaturein the response object.
{
  "razorpay_payment_id": [
    "pay_IXFfPM0ZmuZCZO"
  ],
  "razorpay_order_id": [
    "order_IXFfAUmWgMbCIS"
  ],
  "razorpay_signature": [
    "2b5ea94bed0391ab682df3799667d784a8b99a05cb76f6024669d32775207c99"
  ]
}
- 2] For successful payment, the Payment signature verification step is mandatory, it allows to confirm the authenticity of the details returned to the checkout for successful payments. If the Payment signature verification is successful, the method will return None.
- Failed Payment 😥
1] In the case of failed payment, the Checkout Form is displayed again to retry the payment when a callback URL is not provided at the backend.
2] But when a callback URL is provided, Razorpay will make a POST call to the callback URL that we have provided, with theerror[code], error[description], error[source], error[metadata], error[reason], error[step] in the response object.
{
  "error[code]": [
    "BAD_REQUEST_ERROR"
  ],
  "error[description]": [
    "Payment failed"
  ],
  "error[source]": [
    "gateway"
  ],
  "error[step]": [
    "payment_authorization"
  ],
  "error[reason]": [
    "payment_failed"
  ],
  "error[metadata]": [
   {\"payment_id\":\"pay_IXFh8UJEl2qWhf\",\"order_id\":\"order_IXFgz9yst1G3uw\"}"
  ]
}
✅ We can check all these payments on Razorpay dashboard

That’s all folks 🎉. We have successfully implemented the Razorpay payment gateway on our website. These were the minimal configurations to get work Razorpay payment gateway in our Django project.
At Scalereal We believe in Sharing and Open Source.
So, If you found this helpful please give some claps 👏 and share it with everyone.
Sharing is Caring!
Thank You :) 🙏
If you need any help, you can contact me on LinkedIn, Github, Twitter.
Resources:
GitHub - scalereal/razorpay-integration-django: Basic implementation of Razorpay payment gateway 💳